Intrigued by the idea of uncovering the unseen? A DIY GPR (Ground Penetrating Radar) scanner offers an incredible opportunity to explore the earth beneath your feet. Understanding the principles of electromagnetic waves is crucial before you even start to build your own GPR ground scanner. Enthusiasts often reference the work of MIT’s OpenCourseWare for foundational knowledge in signal processing, a vital component in interpreting the radar data. Hobbyists frequently use tools like Arduino for controlling the GPR’s functions. With dedication and the right resources, you can build your own GPR ground scanner and unlock mysteries hidden beneath the surface, potentially even revealing archeological finds, similar to those uncovered using GPR technology at the ancient site of Pompeii.
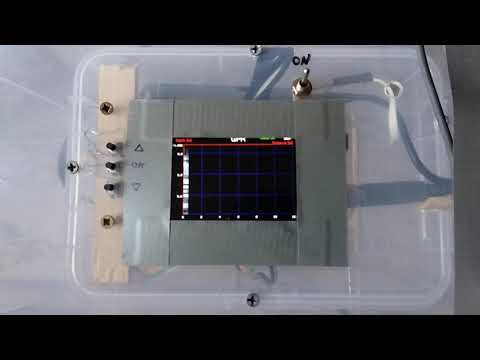
Image taken from the YouTube channel Mirel Paun , from the video titled Homemade GPR working .
Crafting the Ultimate "Build Your Own GPR Ground Scanner" Article
This guide outlines a compelling article layout designed to attract readers interested in building their own Ground Penetrating Radar (GPR) scanner. The layout focuses on clarity, practicality, and an encouraging tone, making the project seem approachable and achievable. The primary keyword is "build your own GPR ground scanner," which should be naturally integrated throughout the text.
Introduction: Unveiling the Hidden World Beneath Your Feet
- Start with an engaging hook. Imagine finding lost artifacts, buried pipes, or even underground chambers! Introduce the concept of Ground Penetrating Radar (GPR) as a tool to achieve this.
- Briefly explain what GPR is and how it works in layman’s terms. Avoid technical jargon at this stage. Focus on the outcome: seeing what’s beneath the surface.
- Introduce the concept of DIY GPR. Highlight the benefits: cost savings, customization, and the satisfaction of building something yourself.
- Tease what the article will cover: the components needed, the basic principles, and the steps involved in building your own GPR ground scanner.
- Clearly state that while this project requires some technical understanding, the article aims to simplify the process and provide resources for further learning.
Understanding the Basics of GPR Technology
This section will provide a foundation of understanding before diving into the build process.
What is GPR and How Does it Work?
- Simplified Explanation: Explain that GPR uses radio waves to penetrate the ground. When these waves encounter changes in material (like a pipe or a void), they reflect back to the scanner. The scanner measures the time it takes for the waves to return, providing information about the depth and location of buried objects.
- Visual Aids: Use simple diagrams or illustrations to show how radio waves are emitted, reflected, and received by the GPR scanner.
- Key Components Explained (briefly):
- Transmitter: Emits the radio waves.
- Receiver: Detects the reflected waves.
- Control Unit: Processes the data and displays the results.
- Factors Affecting GPR Performance:
- Soil Type: Explain how different soil types (e.g., clay, sand) affect the penetration depth of the radio waves.
- Frequency: Explain how lower frequencies penetrate deeper but provide lower resolution, and higher frequencies provide better resolution but less penetration.
Advantages and Limitations of DIY GPR
- Advantages:
- Cost-effective compared to commercial systems.
- Customizable to specific needs and applications.
- Educational and rewarding experience.
- Limitations:
- Performance may not match commercial-grade systems.
- Requires technical skills and knowledge.
- May require calibration and fine-tuning.
Planning Your GPR Ground Scanner Project
This section helps readers prepare before purchasing or building anything.
Defining Your Goals and Requirements
- What do you want to find? Buried pipes, cables, artifacts, voids?
- What depth do you need to reach? Different applications require different penetration depths.
- What is your budget? DIY GPR scanners can range in cost depending on the components used.
- What level of accuracy do you need? Is approximate location sufficient, or do you require precise measurements?
Choosing the Right Components
This section lists the necessary parts, offering guidance for choosing the appropriate ones.
- Transmitter and Receiver:
- Discuss options like software-defined radios (SDRs) or custom-built circuits.
- Provide links to reputable suppliers.
- Explain the importance of selecting components with appropriate frequency ranges.
- Antenna:
- Explain different antenna types (e.g., dipole, Vivaldi).
- Discuss the trade-offs between antenna size and performance.
- Control Unit (Microcontroller/Computer):
- Arduino or Raspberry Pi are common choices.
- Discuss the advantages and disadvantages of each.
- Power Supply:
- Battery considerations (voltage, capacity).
- Enclosure:
- Protecting the electronics from the environment.
- Display (Optional):
- For real-time data visualization.
-
Table of Common Components: Component Description Considerations SDR (Software-Defined Radio) Acts as both transmitter and receiver Cost, Frequency range, Software compatibility Arduino Uno Microcontroller for data processing Ease of use, Available libraries Dipole Antenna Simple antenna for transmitting and receiving radio waves Size, Frequency range, Radiation pattern Rechargeable Battery Provides power to the scanner Voltage, Capacity (mAh), Safety
Software and Programming
- Discuss the software needed to control the GPR scanner and process the data.
- Mention options like:
- GNU Radio (for SDR-based systems).
- Arduino IDE (for microcontroller-based systems).
- Python libraries (e.g., NumPy, SciPy) for data analysis and visualization.
- Provide sample code snippets or links to relevant tutorials.
- Emphasize the importance of understanding basic programming concepts.
Step-by-Step Guide to Building Your DIY GPR Ground Scanner
This is the core section of the article, providing detailed instructions.
Hardware Assembly
- Provide clear and concise instructions on how to connect the various components.
- Use diagrams and photos to illustrate each step.
- Emphasize the importance of proper wiring and grounding.
- Break down the assembly process into manageable steps.
Software Configuration
- Guide the reader through the process of installing and configuring the necessary software.
- Provide step-by-step instructions on how to upload the code to the microcontroller.
- Explain how to calibrate the scanner and optimize its performance.
Testing and Calibration
- Explain how to test the GPR scanner in a controlled environment.
- Provide instructions on how to calibrate the scanner to improve its accuracy.
- Suggest using known objects buried at different depths to test the scanner’s capabilities.
Using Your DIY GPR Ground Scanner in the Field
This section focuses on the practical application of the completed scanner.
Preparing for a Survey
- Site Assessment: Discuss the importance of assessing the survey area for potential hazards (e.g., underground utilities).
- Grid Layout: Explain how to create a grid pattern to ensure comprehensive coverage of the survey area.
- Data Logging: Discuss methods for recording and organizing the data collected during the survey.
Data Acquisition and Interpretation
- Scanning Techniques: Explain how to move the GPR scanner across the survey area to collect data.
- Data Visualization: Discuss how to visualize the data using software tools.
- Interpreting the Results:
- Provide examples of common GPR signatures (e.g., pipes, cables, voids).
- Offer tips for distinguishing between different types of buried objects.
- Limitations: Remind the reader of the limitations of their DIY system and the possibility of inaccurate readings.
Troubleshooting and Common Issues
- Address common problems encountered during the build process or while using the GPR scanner.
- Provide troubleshooting tips and solutions.
- Include a FAQ section to answer frequently asked questions.
- Examples: "My scanner isn’t detecting anything.", "The data is very noisy.", "My Arduino code isn’t uploading."
Further Resources and Learning
- Provide links to online tutorials, forums, and other resources for learning more about GPR technology and DIY electronics.
- Suggest books and articles on related topics.
- Encourage readers to share their experiences and contribute to the DIY GPR community.
DIY GPR Scanner FAQs: Unearth More Insights
Here are some frequently asked questions about building your own GPR (Ground Penetrating Radar) scanner.
What can I realistically find with a DIY GPR scanner?
A DIY GPR (build your own gpr ground scanner) can detect buried objects like pipes, cables, and voids. The success depends heavily on soil conditions and the scanner’s design. Don’t expect to find deeply buried treasures without advanced modifications and expertise.
Is it legal to use a DIY GPR scanner everywhere?
Regulations vary by location. Generally, using a GPR is legal on your own property. However, scanning public land or private property without permission can be illegal. Always check local laws and obtain necessary permits.
How much does it cost to build your own GPR ground scanner?
The cost varies significantly depending on component choices. A basic DIY GPR scanner can range from a few hundred dollars to over a thousand. Factors include the quality of the antenna, the complexity of the electronics, and the software used for data processing.
What level of technical skill is needed to build your own GPR ground scanner?
Building a GPR requires a solid understanding of electronics, signal processing, and basic programming. You’ll need to be comfortable with soldering, circuit design, and potentially working with software like Arduino or similar platforms. It is not a beginner project.
So, what are you waiting for? Time to grab your tools and get started on your journey to build your own GPR ground scanner! Happy treasure hunting!